
Ideas for upcycled paper crafts: 12 projects to try
TL;DR:
- Upcycled paper crafts turn waste like magazines and envelopes into eco-friendly art and gifts.
- They are simple to start with, requiring only basic tools and household materials for beginners.
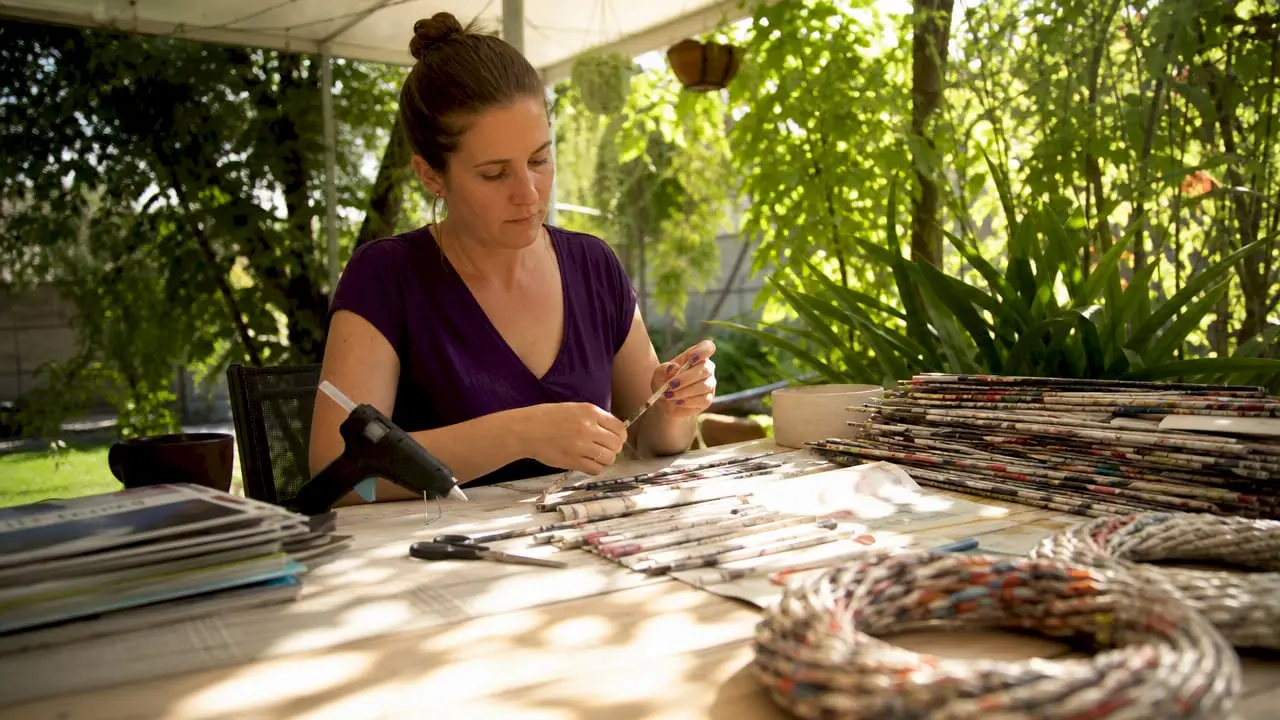
Upcycled paper crafts are DIY projects that transform everyday paper waste, such as magazines, cardboard, junk mail, and old envelopes, into unique, eco-friendly art and functional items. The appeal is straightforward: most projects require only scissors, glue, and twine, meaning you can start without spending a penny on new materials. Upcycling paper also keeps waste out of landfill, which matters to the growing number of hobbyists who want their creativity to reflect their values. Craftsuprint supports this community with downloadable templates, tutorials, and project kits that make the leap from idea to finished piece much shorter.
1. What are the best ideas for upcycled paper crafts for beginners?
The easiest entry point into recycled paper art projects is working with materials you already have at home. Collages, wreaths, and hand-bound notebooks are all accessible to beginners using basic folding, cutting, and pasting techniques. None of these require specialist equipment or prior experience.
Here are the best starting points for newcomers:
- Postcards and gift tags. Cut thick cardboard or cereal box card into rectangles. Decorate the front with torn magazine strips, stamps, or doodles. These make genuinely personal gifts and cost nothing to produce.
- Paper flower collages. Layer circles cut from colourful magazine pages or old envelopes, graduating from large to small, to form petals. Glue each layer slightly off-centre for a natural look. The printed text and colour variations in magazine paper add texture that plain craft paper cannot replicate.
- Simple envelope collages. Colourful envelopes from old greetings cards are ideal for flower and leaf shapes. Cut freehand, arrange on a backing sheet, and glue down. The result looks deliberate and polished with very little effort.
- Animal-shaped collages for children. Tear or cut magazine pages into rough shapes and assemble them into birds, fish, or cats on a plain background. This works well as a family activity and requires no drawing skill.
- Junk mail bunting. Cut triangles from leaflets and thread them onto twine. A single afternoon’s post can yield enough material for a full string of bunting.
Upcycling paper projects offer real cost savings by repurposing household waste that would otherwise go into the recycling bin. The range spans from children’s crafts to small-scale income-generating art, which means the hobby can grow with you.
Pro Tip: Sort your paper waste into categories before you start: glossy magazine pages, plain cardboard, coloured envelopes, and newsprint. Having organised piles cuts your prep time significantly and makes it easier to match textures and tones.
2. How to make wreaths and bowls from recycled paper
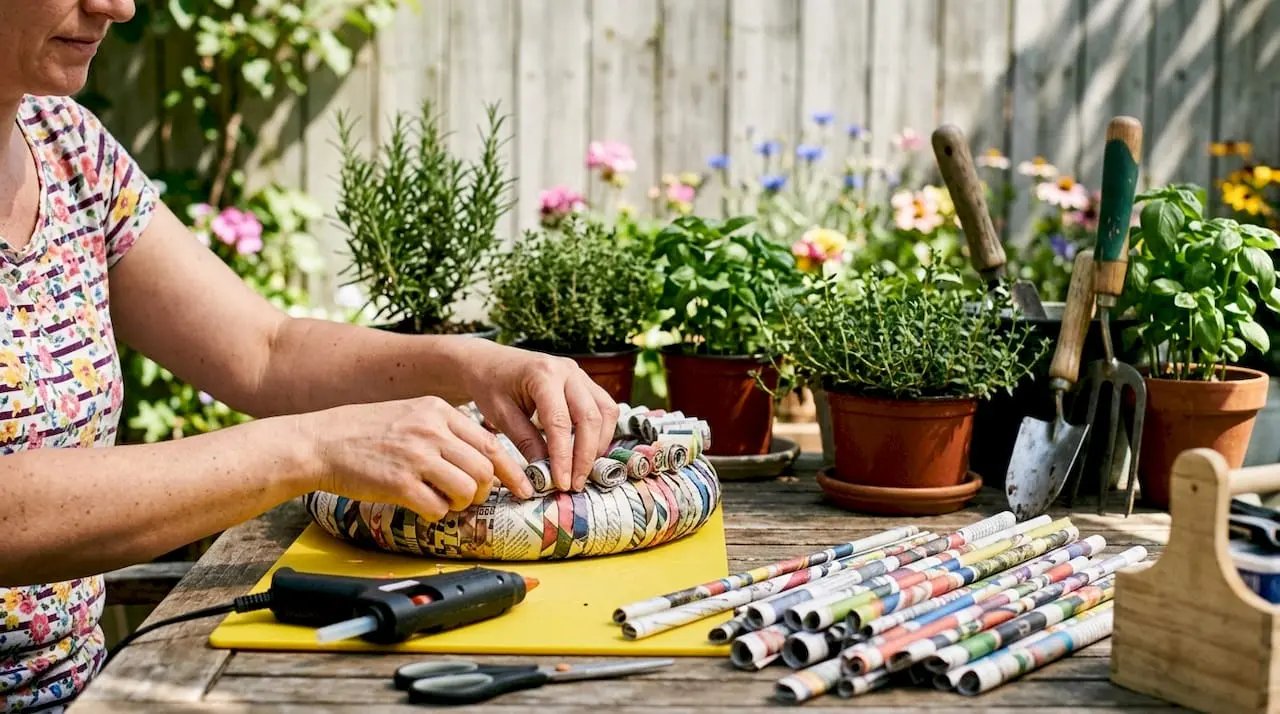
Structural decorative items are where upcycled paper ideas move from flat to three-dimensional. Wreaths and bowls made from rolled or folded magazine pages are among the most satisfying projects because the finished piece looks far more complex than the technique actually is.
Making a magazine page wreath
- Tear or cut magazine pages into strips roughly 3 cm wide.
- Roll each strip tightly around a pencil, then slide it off and secure the end with a small dot of glue.
- Arrange the rolls in a circular pattern on a cardboard base cut into a ring shape.
- Glue the rolls in place, packing them tightly so no cardboard shows through.
- Pre-glue structural pieces in pairs before attaching them to the base. This increases the surface area for bonding and significantly extends the life of the finished wreath.
Making a paper bowl
- Inflate a balloon to the size you want for your bowl.
- Tear newspaper or magazine pages into thin strips.
- Coat each strip in a mixture of PVA glue and water (roughly equal parts).
- Layer the strips over the top half of the balloon, overlapping each one.
- Apply four to six layers, allowing each to dry before adding the next.
- Once fully dry, pop the balloon and trim the rim to a neat edge.
Pro Tip: A hot glue gun speeds up wreath assembly considerably. Work in small sections and press each roll firmly for ten seconds before moving on. This prevents pieces from lifting as the glue cools.
Hand-bound notebooks made from packing paper and cardboard covers follow a similar principle of layering and reinforcement. Fold sheets of packing paper in half, stack them inside a folded cardboard cover, and bind the spine with a needle and waxed thread using a simple pamphlet stitch. The result is a functional notebook with real character. You can find detailed handmade paper crafting guides on the Craftsuprint blog if you want to take the technique further.
3. What techniques can elevate your paper crafts with collage and handmade paper?
Advanced creative paper reuse moves into two distinct areas: making your own paper from pulp, and building collages with genuine compositional intent. Both techniques produce results that look professional without requiring professional equipment.
Making handmade paper from pulp
Creating handmade paper requires a DIY mould and deckle, which you can assemble from an old picture frame and a piece of fine mesh or net curtain. The process works as follows:
- Tear scrap paper into small pieces and soak them in water overnight.
- Blend the soaked paper with additional water until you have a smooth pulp.
- Pour the pulp into a large tray of water and submerge your mould and deckle.
- Lift the frame horizontally so a thin layer of pulp settles on the mesh.
- Press out excess water with a sponge, then turn the sheet onto a flat cloth to dry.
Adding dried flower petals or natural colour during the pulp stage produces paper with a texture and visual depth that no commercially made sheet can match. Lavender, rose petals, and leaves all press flat during drying and become part of the sheet itself.
Planning and building a collage
“Plan your collage with a pencil sketch on the backing sheet before you glue anything down. Work from background to foreground, adding layers progressively. This approach reduces waste and gives the finished piece a sense of depth that spontaneous gluing rarely achieves.” — collage technique principle from Sum of Their Stories
Sketching your composition before gluing reduces material waste and produces a more intentional design. Once the background layer is fixed, build up mid-ground elements, then add foreground details last. Doodles, pen shading, and fine-liner outlines added after gluing tie the layers together and give the piece a finished, illustrated quality.
4. Which upcycled paper craft ideas work best for children and families?
Paper crafting supports fine motor skill development and offers a meditative experience for both adults and children. Folding, weaving, and collaging all build patience and hand-eye coordination in ways that screen-based activities do not.
The following projects work well for mixed-age groups:
- Paper hats and crowns. Fold a double sheet of newspaper into a classic boat hat or cut a strip of cardboard into a crown shape and decorate with magazine cut-outs. Both take under ten minutes and require no glue.
- Paper weaving. Cut parallel slits into a rectangle of cardboard, leaving a border intact. Weave strips of contrasting magazine pages over and under the slits. The paper weaving technique builds concentration and produces a striking woven panel suitable for display.
- Paper bracelets. Cut long thin strips from magazine pages and fold them into tight accordion pleats. Connect the ends with a small piece of tape. Children can make a full set in one sitting.
- Animal paper dolls. Draw simple animal outlines onto cereal box card, cut them out, and decorate with torn magazine pieces. Add a folded tab at the base so each figure stands upright.
- Glue-free paper loops. Cut strips of paper and link them into chains by slotting the ends together without adhesive. This is ideal for very young children who find glue messy.
Keeping a dedicated crafting kit ready with scissors, a glue stick, spare paper, and a cutting mat reduces the gap between wanting to create and actually starting. That reduced friction keeps children engaged and makes the activity feel spontaneous rather than effortful.
Pro Tip: Prepare a “paper stash” box with pre-sorted scraps of magazine pages, cardboard, and coloured envelopes. When children want to craft, the materials are ready immediately. This removes the setup barrier that often kills momentum.
Craftsuprint’s craft kit assembly guide walks through exactly how to put together a starter kit that covers most family paper craft projects without overspending on tools.
5. How to choose the best upcycled paper materials for your projects
Not all paper waste performs equally in craft projects. Choosing the right material for the right application makes the difference between a project that holds together and one that falls apart after a week.
| Paper type | Texture and weight | Best uses | Limitations |
|---|---|---|---|
| Glossy magazine pages | Smooth, medium weight | Collages, rolled wreaths, paper flowers | Can be slippery to glue; ink may transfer |
| Cardboard and cereal boxes | Rigid, heavyweight | Bowls, book covers, gift tags, bases | Difficult to fold tightly; needs scoring |
| Junk mail and leaflets | Lightweight, varied colour | Bunting, layered collages, pulp making | Tears easily; limited structural strength |
| Coloured envelopes | Smooth, medium weight | Flower petals, geometric shapes, collage | Limited quantity per household |
| Business cards | Rigid, small format | Mosaic-style collages, bookmarks | Small size limits versatility |
| Packing and kraft paper | Rough, heavyweight | Notebook covers, wrapping, papier mâché | Neutral colour only; limited decorative appeal |
Preparing your paper before crafting improves results noticeably. Flatten curled magazine pages under a heavy book overnight. Remove staples and tape from cardboard before cutting. If you plan to make pulp, avoid heavily inked or laminated paper as these resist breaking down in water. Sourcing paper from community swap groups, local print shops, and office recycling points gives you a wider variety of weights and colours than household waste alone provides.
Pro Tip: Score cardboard along fold lines using a blunt knife and a ruler before bending. This produces a clean, sharp fold rather than a ragged crease, which matters most on notebook covers and gift boxes.
6. Turning paper crafts into something you can sell or share
Upcycled paper projects can range from children’s crafts to small-scale income-generating art. The step from hobby to small business is smaller than most crafters expect. Handmade notebooks, greeting cards, and framed collages all sell well at craft fairs and online marketplaces. The material cost is effectively zero, which means even modest pricing generates a real return.
The key to selling paper crafts is consistency of finish. Buyers respond to clean edges, secure gluing, and thoughtful presentation. Wrapping finished pieces in tissue paper and adding a handwritten note about the upcycled materials used adds perceived value without adding cost. Craftsuprint’s merchandise marketplace gives crafters a platform to list and sell handmade items directly to an engaged community of buyers who already value handmade work.
Sustainability is a genuine selling point. Craft bloggers note that upcycling gives added meaning to the hobby, and buyers increasingly seek out products with a clear environmental story. Labelling your work as made from reclaimed paper, and being specific about the source materials, builds trust and differentiates your pieces from mass-produced alternatives.
Key takeaways
Upcycled paper crafting is most successful when you match the right paper type to the right technique, prepare your materials properly, and build projects progressively from simple collages to structural three-dimensional pieces.
| Point | Details |
|---|---|
| Start with what you have | Magazines, cardboard, and junk mail cover the majority of beginner projects without any cost. |
| Prepare materials first | Flatten, sort, and de-staple paper before crafting to improve finish quality and reduce frustration. |
| Plan collages before gluing | Sketch your composition and layer from background to foreground to reduce waste and improve cohesion. |
| Reinforce structural pieces | Pre-gluing wreath rolls in pairs and applying multiple papier mâché layers extends the life of 3D projects. |
| A ready kit removes barriers | Keeping tools and sorted paper stash accessible makes crafting sessions start faster and last longer. |
Why upcycled paper crafts are worth more than the materials suggest
The first time I made a wreath from rolled magazine pages, I expected it to look like a school project. It did not. It looked like something I would have paid for in a craft shop, and that gap between expectation and result is what keeps me coming back to paper crafting.
The honest challenge with upcycled materials is that you cannot fully control them. A magazine page tears where it wants to. Cardboard has a grain that resists folding in one direction. Old envelopes have glue residue that interferes with fresh adhesive. Embracing those imperfections is not a compromise. The prints, textures, and irregularities in reclaimed paper add character that new craft paper simply does not have.
My practical advice is to set up a permanent crafting corner, even if it is just a shelf with a box of sorted paper and a small tool roll. The crafters I know who stick with the hobby long term are the ones who removed the setup friction. When the materials are ready, the ideas follow naturally.
Paper crafting also offers genuine therapeutic value. The focused, repetitive actions of folding, cutting, and layering quiet a busy mind in a way that is hard to replicate elsewhere. If you approach each session without a fixed outcome in mind, you will produce better work and enjoy the process more.
— Rob
Craftsuprint has the tools and templates to get you started
Whether you are assembling your first paper flower collage or planning a full set of handmade notebooks, having the right templates and tools makes every session more productive.

Craftsuprint offers a wide selection of paper craft downloads including printable patterns, shaped templates, and project kits designed for hobbyists at every level. The craft supplies classifieds list tools and materials from independent sellers, so you can source exactly what you need without buying in bulk. New members can also claim a free craft gift as part of the Create and Craft membership offer. It is a straightforward way to add quality resources to your crafting practice from day one.
FAQ
What paper is best for upcycled paper crafts?
Glossy magazine pages work well for collages and rolled wreaths, while cardboard and kraft paper suit structural projects like bowls and notebook covers. Matching paper weight to the project’s structural demands produces the best results.
How long do upcycled paper craft projects take?
Most projects take 30–60 minutes from start to finish, making them practical for an evening session. Multi-layer projects like papier mâché bowls require additional drying time between stages.
Are upcycled paper crafts suitable for young children?
Paper weaving, paper chains, and animal collages are all suitable for children, as they build fine motor skills and concentration without requiring sharp tools or complex techniques. Glue-free projects work particularly well for younger children.
Do I need specialist tools to start?
Scissors, a glue stick, and a cutting mat cover the majority of beginner projects. A hot glue gun and a bone folder are useful additions for structural and folded work but are not required at the outset.
Can I sell crafts made from upcycled paper?
Handmade notebooks, greeting cards, and framed collages all sell well at craft fairs and online. The near-zero material cost means even modest pricing generates a worthwhile return, particularly when the sustainable origin of the materials is clearly communicated to buyers.