

Woven Ribbon Card 1
This is the most beautiful card when made and it is very easy to do. You will need one or two lengths of ribbon to complete the card. Full instructions are on the sheet.
You have a card front, flowers to decoupage and two paper borders.
Cut out all the pieces. Carefully cut out the white semi circles. Thread your ribbon through the holes and secure on the back using glue dots, tacky glue or tape. Once dry stick your borders behind the apertures so that the pattern shows through the holes (if required - this is not compulsory). Stick your card front onto an A5 card. Decoupage the flowers and stick a ribbon bow at the top of your woven ribbon to finish off.
I have included a small photo of the finished card on the sheet.


Photographs from the Community


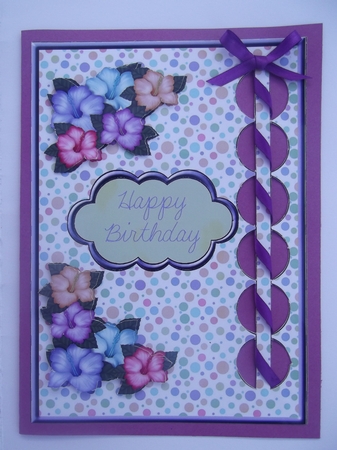
This is printed on glossy card and the semi circles cut out. I laced a length of purple satin ribbon through the cut outs and secured with Sellotape and glued in place on the back and made a matching bow from the remaining ribbon.
I then glued the whole design onto a purple card, and added the decoupaged flowers using sticky pads, to complete this pretty card.


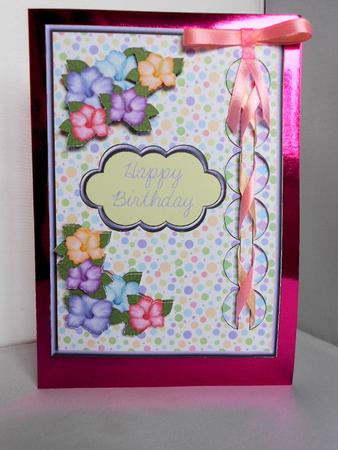
I printed onto smooth white 220gsm card. I cut out all the pieces and used a sharp craft knife to cut out the white semi circles. I took 2 pieces of ribbon and glued the top ends to the back of the card above the top of the cut out semi circles. I then threaded the ribbons through the holes and secured at the bottom on the back of the card with glue and tape. I stuck the borders behind the apertures with the pattern facing the front but this stage could have been left out and the pink mirror card would have shown through the holes.
I made an A5 card from a sheet of A4 pink mirror card and stuck the card front to this using DST. I decoupaged the flowers using foam pads and stuck them to the card. I made a ribbon bow and stuck it to the card at the top of the woven ribbons using tacky glue. I am really pleased with this card and I'm sure the recipient will like it too.

