


3D Xmas Santa Sleeps Till Santa Countdown Card
A lovely interactive card with one of my soft and adorable felties designs. Pop felties in the search box to find more in the same style!
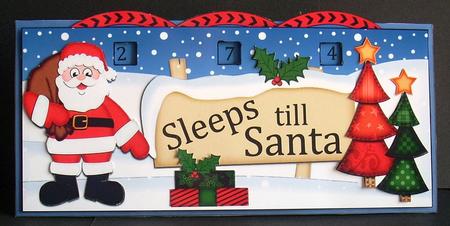
A fabulous keepsake card that is simple to make but looks really stunning when made up and will WOW the recipient. A Card with a difference ... it counts down the Sleeps till Santa arrives!! Just turn the wheel/s once a day to reveal the next number/s ... how cute is that!!
There are 3 wheels that allow the recipient to count down any number from a maximum of 399. Just set the wheels to the required number before giving the card. For instance set to 364 Sleeps Till Santa and give to the recipient on boxing day ............. making a card that lasts a year and counts down the days till Santa comes again!!
Everything you need to make a really gorgeous card with an animated moveable wheels movement. This animated card folds flat for posting ... and .... I have also included a matching gift tag and envelope too!
Included in this 3d card kit:- Card front and back, front panel, decoupage layers, countdown wheels, greetings sentiments, blank sentiments panels, gift tag and matching envelope.
Full pictorial instructions are also included in the kit.
There are many more of my Sleeps Till Santa Card Kits to choose from and together they would make a great set of cards to sell at craft fairs etc.
This 3D animated card kit is great for Christmas cards, Xmas Cards, Baby's First Christmas Cards etc
 3D Xmas Rudolph's Cracker Sleeps Till Santa Countdown Card
 3D Xmas Penguin Sleeps Till Santa Countdown Card
 3D Xmas Freddy Frog Sleeps Till Santa Countdown Card
 3D Xmas Scottie Dog's Tree Sleeps Till Santa Countdown Card
 3D Xmas Owls Sleeps Till Santa Countdown Card
 3D Xmas Teddy Tess Sleeps Till Santa Countdown Card
 3D Xmas Gigi Horse Sleeps Till Santa Countdown Card
 3D Xmas Milly Moo Cow Sleeps Till Santa Countdown Card
 3D Xmas Polar Bear's Pud Sleeps Till Santa Countdown Card

Photographs from the Community

I printed the base of this card on to white card, and the other sheets on to glossy photo paper.
Did the scoring and folding before cutting out the base, then attached the number wheels with brads before sticking the two parts together with DST.
Added the decoupage with glue gel. Printed the envelope on 120 gsm paper, cut out and assembled. Fold the gift tag in half.


I printed the design onto good quality 255gsm photographic paper and cut it out. I scored and folded the design as instructed. I added the wheels with the numbers to the front panel using brads from my craft box.
I cut out each of the little squares and then I attached the image panel to the front using thin foam tape on the corners only to allow the wheels to turn.
The numbers are visible through the little squares. I assembled the decoupage using thin foam tape. This lovely design also comes with a matching gift tag and envelope.