


Vintage White Rose Circle Pyramid Pop Through Mini Kit
Shabby chic design featuring gorgeous white rose circle and white rose vignette on pop through pyramid.
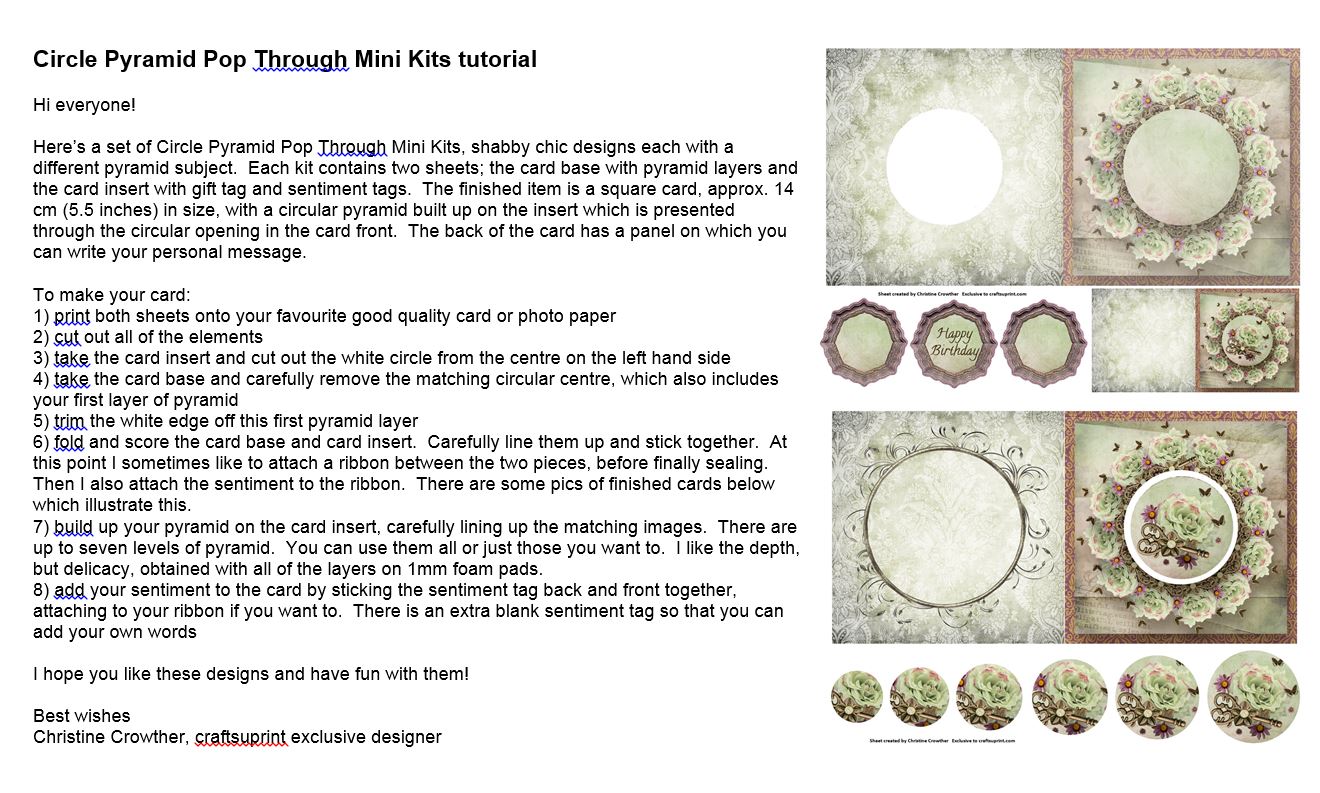
Please see tutorial for instructions and finished card examples.
Each kit contains two sheets; the card base with pyramid layers and the card insert with gift tag and sentiment tags. The finished item is a square card, approx. 14 cm (5.5 inches) in size, with a circular pyramid built up on the insert which is presented through the circular opening in the card front. The back of the card has a panel on which you can write your personal message.
Hi everyone! Hereâ??s a set of Circle Pyramid Pop Through Mini Kits, shabby chic designs each with a different pyramid subject.
Each kit contains two sheets; the card base with pyramid layers and the card insert with gift tag and sentiment tags.
The finished item is a square card, approx. 14 cm (5.5 inches) in size, with a circular pyramid built up on the insert which is presented through the circular opening in the card front.
The back of the card has a panel on which you can write your personal message. To make your card: 1 - print both sheets onto your favourite good quality card or photo paper 2 - cut out all of the elements 3 - take the card insert and cut out the white circle from the centre on the left hand side 4 - take the card base and carefully remove the matching circular centre, which also includes your first layer of pyramid 5 - trim the white edge off this first pyramid layer 6 - fold and score the card base and card insert.
Carefully line them up and stick together. At this point I sometimes like to attach a ribbon between the two pieces, before finally sealing. Then I also attach the sentiment to the ribbon.
There are some pics of finished cards below which illustrate this. 7 - build up your pyramid on the card insert, carefully lining up the matching images.
There are up to seven levels of pyramid. You can use them all or just those you want to.
I like the depth, but delicacy, obtained with all of the layers on 1mm foam pads. 8 - add your sentiment to the card by sticking the sentiment tag back and front together, attaching to your ribbon if you want to.
There is an extra blank sentiment tag so that you can add your own words I hope you like these designs and have fun with them! Best wishes Christine Crowther, craftsuprint exclusive designer


Related Products


Photographs from the Community

I printed the 2 design sheets on to a Glossy Photo Paper. I clipped all the items out. I made a Background paper and waved the edges in a Fuschia colour that matched the smaller flowers in the design.
I glued the main design on to the Background paper and then both of them on to a 8 by 8 Scalloped card.
I followed the Instructions and did accordingly and I hope I did it the right way?! I first attached the Insert on to the main design after cutting the White circle out on the insert and the main design.
I attached the Decoupage/3D and Sentiment on with CUP´s STIX2 Sticky pads 5mm 5mm 3mm. I love when you can put a personal toutch to the design you turn in to a Beautiful card!!! Such a Quick and easy card to make out of this Beautiful, Gorgeous and Stunning design!!! I recomend it to all of you!!! Enjoy your crafting!


Printed on 200 gsm paper, I cut out all of the elements and followed the instructions using dst to assemble the card and foam pads for the decoupage.
This is a beautiful design.