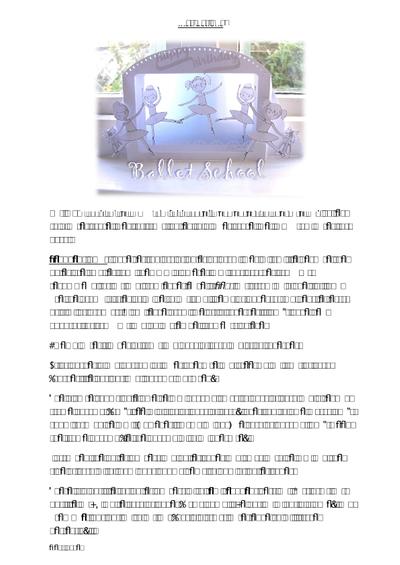

in silhouette studio, svg and fcm formats; NB fcm format has border arc (holes) at top of card set for "draw" as diameter of holes is less than scanncut recommended 3mm cut min which would put strain on blade tip, so would suggest scanncut users opt for fcm version ONLY (not svg).
Drawn border can be used to position small gems or pearl drops etc. or if don't have the scanncut pen adaptor just leave arc border off.
Other machines cut small holes fine, The studio version has ballerina graphics in two studio print and cut files with registration marks; svg version had two transparent png files for ballerina graphics that can easily be imported into say Cricut Design Space (if have Cricut), and using a simple trace easily create print and cut files; the fcm version has an A4 pdf of the graphics that cut like a dream using Direct Cut function in scanncut.
Regular cut files are main card, lacy border (for bottom of back frame), happy birthday greeting with swags (for top of front of card), backing that can be cut in vellum as in picture and a masking element to cover visible glue marks through vellum for back of card.
Folds flat for posting. Full pdf Instructions included and also under tutorial tab top right
BALLET SCHOOL CARD
Cut main card twice, mountain fold score lines nearest to aperture and valley fold outer score lines for front; valley fold inner score line, mountain outer for back.
Scanncut users: have set top arc of holes as draw lines in fcm file because the holes are smaller than the 3mm diameter min that brother scanncut recommend for cut and from experience it does put strain on blade tip.
Can use the drawn circles as guide to put small gems or dovecraft 3d pearl effects or similar products – can leave draw line off altogether if dont have pen adaptor for scanncut and do any embellishments by eye.
Line up outer flanges of front and back of card and stick together. Stick border along bottom of inner aperture and greeting on front of card ( border file has optional backing, not used ).
The picture shows pale blue vellum backing stuck to back of card and a second frame backing ( cant see in pic as at back of card ) , over top so glue marks dont show through vellum.
However if using an opaque card as backing, dont need the frame backing ( ie the backing with an aperture ).
I arranged the ballet dancers and ballet shoes and stuck onto vellum and the side of card with foam pads adding gems to bow of ballet shoes.
There is a pdf file for ballet dancers with fcm scanncut version. Just print out pdf file on A4 white card or paper ( using actual size option in pdf dialogue ) and use Direct Cut option to cut out ( has a distinct outer edge so will trace perfectly ).
With silhouette studio version there are two silhouette studio print and cut files with registration marks. For svg users there are 2 png files for tracing if your software allows.
Cricut Design Space users As ref for Cricut users scale the main card to fit up to edge of card/mat; its diagonally orientated to make use of as much of card as poss ( and scale the rest of the elements in proportion ), as in general svgs imported into Cricut design space dont retain correct size dimensions.
Also for Cricut (and other svg users) I have included 2 separate png files - can import each transparent png file for simple image trace within Cricut Design Space, and then resize so ballerinas are about 3. 25 inches tall as again graphic files are imported too small


