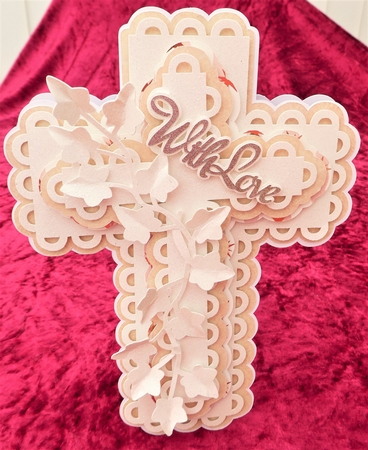

A beautiful scalloped cross layered card
Cross Card TF0078
Photographs from the Community


I unzipped the file and loaded the files into my cricut design space. I resized to 8 inches by 6 inches. I cut out the various layers in ombre glitter card (pink to gold, and green, blue to purple and plain white from Hobbycraft), ombre pastel card and the base in white 250gsm card.
I did not use all 7 layers. I used alternate layers. I stuck the fist layer onto the base card with a glue stick. I then layered up the card using 3-d foam pads. I did not use the Easter sentiment, just the With love and the ivy leaves.
I loved thinking of the colour combinations. You can really get different effects just by changing a colour here and there.
I think these are great for Easter, sympathy, 1st Communion, Confirmation or Christening cards.


I purchased this file for Scan n Cut I then resized it to fit the christening card I wanted to make and added it as an embellishment.
Just another way to use the file,
There are 7 Layers to the Cross I started with 1st layer on White card then 2nd on silver mirror card 3rd on white 4th on silver and so on. I then made a dedication to put name on the front of the cross but that is optional you can embellish however you want to.


I unzipped the file and loaded the files into my cricut design space. I resized to 8 inches by 6 inches. I cut out the various layers in ombre glitter card (pink to gold, and green, blue to purple and plain white from Hobbycraft), ombre pastel card and the base in white 250gsm card.
I did not use all 7 layers. I used alternate layers. I stuck the fist layer onto the base card with a glue stick. I then layered up the card using 3-d foam pads. I did not use the Easter sentiment, just the With love and the ivy leaves.
I loved thinking of the colour combinations. You can really get different effects just by changing a colour here and there.
I think these are great for Easter, sympathy, 1st Communion, Confirmation or Christening cards.


